Some of the links on this site are Amazon affiliate links. As an Amazon Associate, if you make a purchase, I may receive a small commission at no additional cost to you. These commissions help support the content I create and keep the site running. I only recommend products that I use, trust, or would personally use myself. For more details, please read this site’s disclosure policy.
You spent years working for this moment. The last thing you want is a cap that looks like it fell apart on the way to the ceremony.
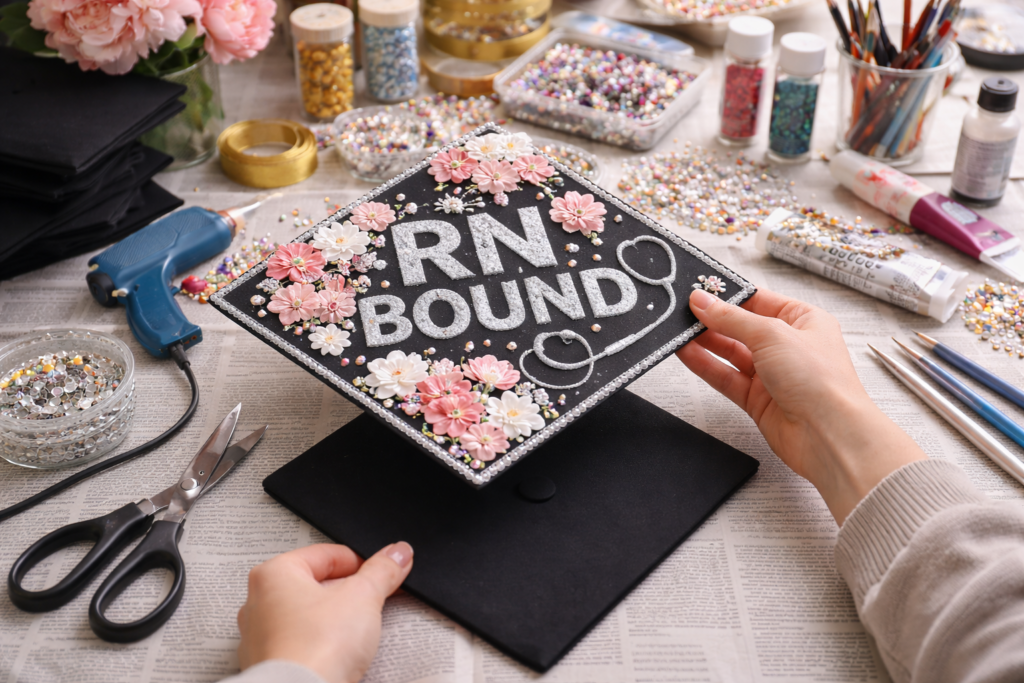
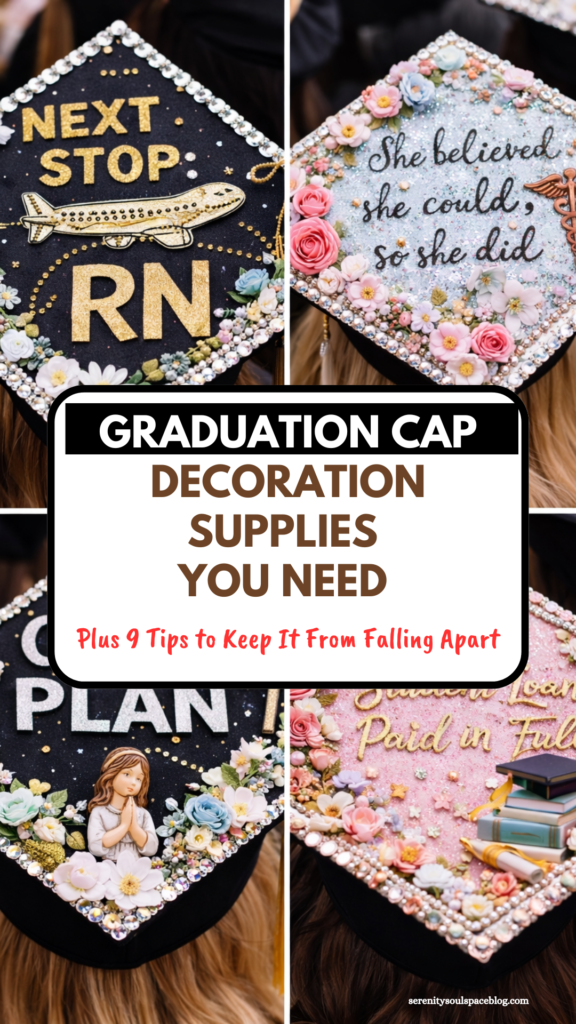
Decorating your graduation cap is supposed to be fun, but it can go sideways fast if you skip a few steps. Before you grab the glue gun, here are the tips you need to get it right the first time.
Pick Your Theme Before You Touch the Cap
Do not start decorating until you know exactly what you want. Sounds basic, right? But so many people skip this part and end up stuck with glitter in the wrong spot and stickers they can’t pull off cleanly.
Sit down first and decide on your quote, your colors, and what supplies you’ll need.
Maybe it’s something faith-based, a line from your favorite show, or just the year you graduated. It doesn’t have to be deep. It just has to feel like you.
Grab a piece of paper and trace the outline of your cap top. Then draw your design inside that outline.
This step saves you so much frustration. You’ll see right away if the letters don’t all fit or if things look too crowded. Way better to figure that out on paper than after you’ve already pressed everything down onto the cap.
Gather All Your Supplies Before You Start
Stop in the middle of a project to go hunt down more supplies and things go wrong fast. Get everything together first.
Here’s a starter list to work from:
a hot glue gun
craft glue
acrylic paint
scissors
fabric pens
rhinestone stickers
alphabet stickers
a spare cap (if you can get one)
Some schools sell extras, or you can order them on my storefrontbelow for a few dollars.
Speaking of that extra cap, here’s a smart move most people don’t think about. Instead of decorating your actual cap, cut a piece from the spare cap that matches the size of the flat top. Decorate that piece instead.
Once you’re happy with how it looks, glue the whole decorated piece on top of your real cap.
Your actual cap stays clean underneath, and if something goes wrong on the spare, you haven’t ruined anything important.
Set Up a Good Workspace
Find a clear, flat spot to work. Put down some newspaper or a trash bag if you’re using paint or glitter. Lay out all your supplies so you don’t have to go digging around mid-project.
You may need to leave the cap to dry overnight, so pick a spot where it can sit undisturbed and won’t get bumped.
There’s a difference between planning ahead and stressing yourself out over something that should be enjoyable. If you’ve sketched your idea and you like it, go with it.
Your cap doesn’t need to be a work of art. It needs to feel like you.
Too much overthinking leads to second-guessing, which leads to pulling things off and trying to stick them back down. That’s how caps get ruined.
Make Sure Everything Is Secured
Once everything is in place, press it down firmly and let it dry completely before touching it again. This matters more than people realize.
Rhinestones, letters, and small decorations can look perfectly set and still pop off hours later if they weren’t pressed down well. The last thing you want is decorations falling off while you’re walking across the stage.
Add a Tassel Guard
If your cap has a tassel clip or slot, take a second to make sure your decorations don’t cover it or block it in a way that makes the tassel hard to move. You’ll likely be flipping it during the ceremony, and you don’t want anything getting in the way.
Once graduation is over, don’t just toss the cap in a box. Frame it. You can frame the whole thing or just remove the decorated top piece and frame that.
You put real effort into making it. A shadow box keeps it protected and turns it into something you’ll actually want to look at years from now.
One Last Thing
Before You Start Gluing
The cap is just a small piece of a huge day, but it’s yours to do whatever you want with.
Plan a little, prep your supplies, and don’t rush the process. You’ll end up with something you’re genuinely proud to wear and cherish for years to come.


")


")
No Comment! Be the first one.